The Facebook pixel lets you track conversions for your ad campaigns two ways: with standard events and custom conversions. You need to install the Facebook pixel on every page of your website. Click Pixels in your Facebook Ads Manager. Select Track Conversions With Standard Events. There are nine standard events you can track for Facebook ads. It allows you to install the Facebook pixel across your whole site with one click and create standard events for the specific actions you want to track. Add standard events in the PixelYourSite plugin. Then click Create Custom Conversion. Next, select an event you want to track (Purchase, for example) and enter the parameters associated with the events you created in Step 3 when you added the conversion code to your website. Add standard event actions to your Facebook Ads Manager reporting.
Do you track the results of your Facebook campaigns?
Are you using the old conversion code that’s about to be phased out?
Setting up Facebook’s conversion tracking will let you track your return on investment (ROI) down to the penny.
In this article, you’ll discover how to set up and install conversion tracking using the new Facebook pixel.
Two Ways to Track Conversions for Facebook Ads
On February 15, 2017, Facebook will be disabling the old conversion tracking pixel. In preparation for that date, you’ll need to set up conversion tracking using the new Facebook pixel.
The Facebook pixel lets you track conversions for your ad campaigns two ways: with standard events and custom conversions.
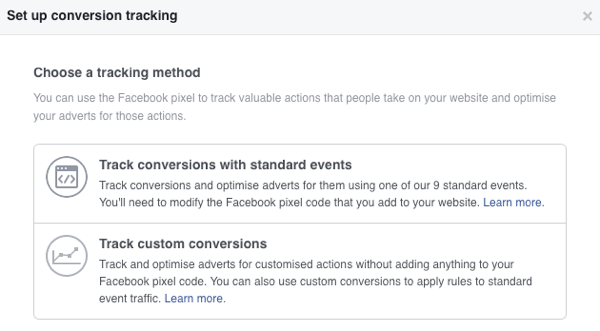
The custom conversions method is the simplest form of conversion tracking, requiring no modification of the Facebook pixel code on your website. This tracking method is contained within the Facebook Ads Manager and uses the URLs of the pages you want to track.
The second, more advanced method of tracking your conversions comes from using standard events. This method involves pieces of code that track a specific action and sit within the Facebook pixel on the web page you want to track.
There are nine standard event actions you can track, and installing them requires you to modify the Facebook pixel on your website. Here’s how to get started.
#1: Install the Facebook Pixel
Before you can set up conversion tracking for either method (custom conversion or standard event), ensure that you have the Facebook pixel set up and installed on your website.
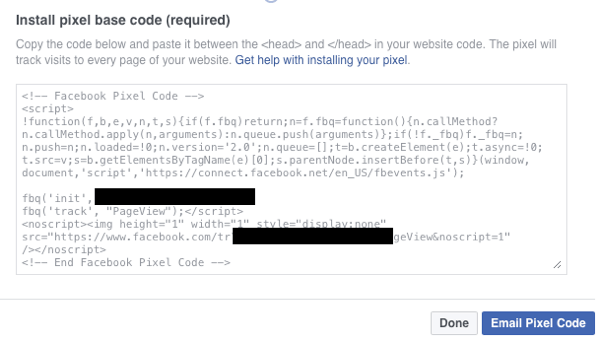
You need to install the Facebook pixel on every page of your website. This allows you to gather data on all of your page views and establish a baseline for measuring specific events. For a step-by-step guide on how to install the Facebook pixel, click here.
#2: Choose Which Standard Event Actions to Track
Now you need to decide which standard events to track. Currently, you can track nine event actions: View Cart, Search, Add To Cart, Add To Wishlist, Initiate Checkout, Add Payment Info, Purchase, Lead, and Complete Registration.
The actions you’ll want to track will depend on your Facebook ad campaign objective and the overall goal of your ad campaigns.
For example, if you sell products online and you’re using Facebook ads to generate sales, you’ll want to track ecommerce actions such as Search, View Content (content views on product pages), Add To Cart, Initiate Checkout, and Purchase actions.
In your Facebook Ads Manager, click on the menu button in the top-left corner and click All Tools at the bottom of the menu.
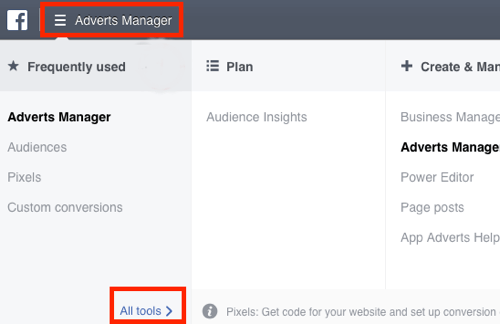
Then under the Assets column, click Pixels.
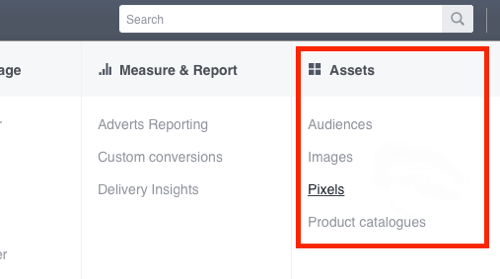
This opens the pixels dashboard. Under Conversion Tracking Pixel (Old), click the Create Conversion button.
A pop-up menu will appear with the two conversion methods. Select Track Conversions With Standard Events.
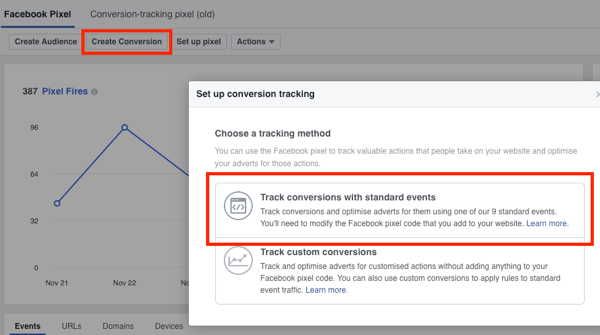
Another pop-up box will appear with the nine standard event actions.
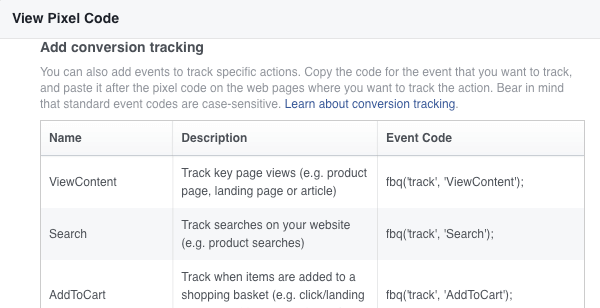
You’ll see a description of each action and a column with the code you’ll need to add to the Facebook pixel on the page you want to track.
#3: Install the Conversion Code on Your Website
Now that you know what actions you want to track and where to find the code snippets in the Ads Manager, the next step is to add the conversion code to your website. How you do this will depend on your website platform and coding knowledge.
If you have sufficient coding skills or have a website developer, you can just manually copy and paste the Facebook pixel with the standard event code into the tags of the page you want to track.
If you don’t feel comfortable with coding, you can use a plugin to install the conversion code. If you have a WordPress website, there’s an awesome free plugin called PixelYourSite. It allows you to install the Facebook pixel across your whole site with one click and create standard events for the specific actions you want to track.
To use it, go to Plugins in your WordPress dashboard and click Add New. Then search for PixelYourSite.
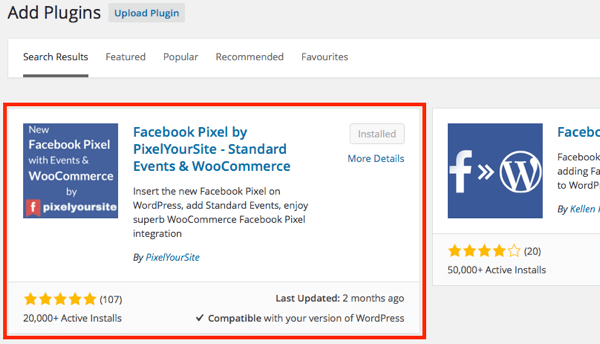
Once you find the PixelYourSite…
COMMENTS