How to Use Twitter Website Conversion Ads. Do you know how to use website conversion ads on Twitter? #1: Set Up Your Tracking Tag As the name suggests, Twitter’s new Website Conversions objective is optimized for conversions and you’ll pay when users click to your site. Click Create Campaign. Next, enter a name for your campaign tag. You also have the option to save a tailored audience from the users who visit the pages you place the code on. Targeting on website conversion ads works like it does for all other Twitter ads. Here you can enter a new tweet, add website cards, a URL, and/or other media (such as images). Are you seeing a drop-off in clicks or conversions on your ad? Have you used the new website conversion ads?
Want to improve the performance of your Twitter ads?
Do you know how to use website conversion ads on Twitter?
Whether you’re looking to increase downloads of an ebook or get
more sales, the Website Conversions objective will improve the
performance of your Twitter ads.
In this article, you’ll discover how to get started with
Twitter’s new website conversion ads.

Twitter.
#1: Set Up Your Tracking Tag
As the name suggests, Twitter’s new Website Conversions
objective is optimized for conversions and you’ll pay when users
click to your site.
To use this ad objective, first you need to set up a tracking
pixel or tag. The tracking pixel is a snippet of Java code that you
place on your site to track the traffic that comes from
Twitter ads. If the process sounds intimidating, don’t worry;
it’s a lot easier than it sounds.
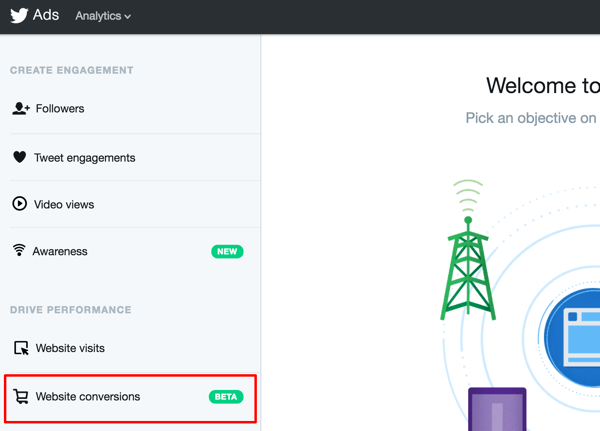
To set up this tag, navigate to your Twitter Ads
dashboard and click on the Website Conversions
objective under Drive Performances. This objective is
still in beta testing, which means that small changes might be made
and some users may not have it yet.

performance and optimize for multiple types of conversions on your
website.
Next, you’ll see an overview of the objective, including the
notification that you’ll be paying for clicks on your link. (Note
that this is different from Facebook’s Conversions objective, where
you can pay only when the actual desired action is taken.)
Click Create Campaign.

mobile users.
In the Website Tag for Conversion Tracking section under Step 1,
click the Set Up Your First Conversion Event
link.

Conversion Event to create a tracking tag.
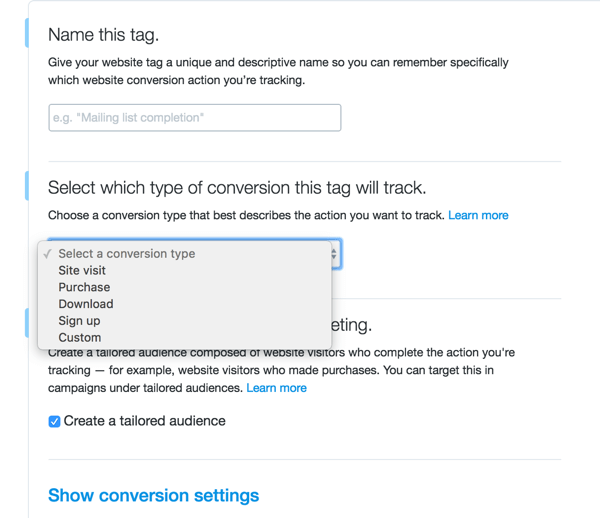
Next, enter a name for your campaign tag. If
you want to track sales, for example, you could name the tag “Check
Out.” Later place the code for this conversion tracker on the Thank
You for Your Purchase page that users see after they purchase from
you.
You’ll also need to select the type of
conversion. Your options include Site Visit, Purchase,
Download, Sign Up, and Custom.

including a custom conversion of your choosing.
You also have the option to save a tailored audience
from the users who visit the pages you place the code on.
This allows you to create retargeting campaigns later on.
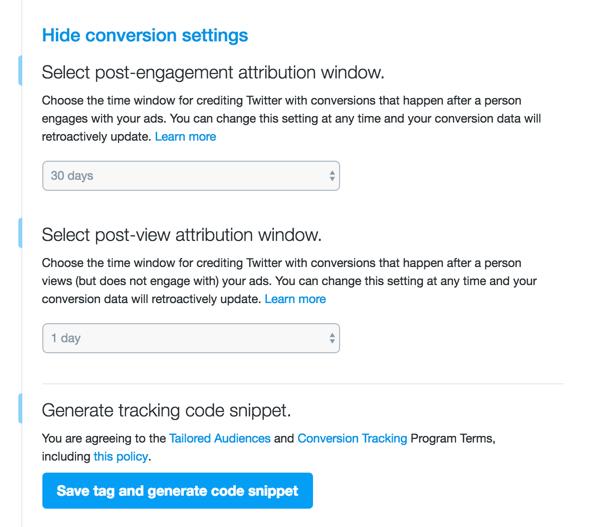
If you click Show Conversion Settings, you’ll
reveal options to customize the post-engagement or
post-view attribution window, which means you can choose
how long you’ll give Twitter credit for conversions that happen on
your site.

attribution windows makes it easier to track the impact Twitter ads
are having on your business.
In other words, if a user clicks to your site through Twitter
ads but doesn’t make a purchase for 30 days, you can decide if you
want to give Twitter attribution. This is for your own marketing
purposes and doesn’t cost extra.
Now save the tag to generate the code snippet.
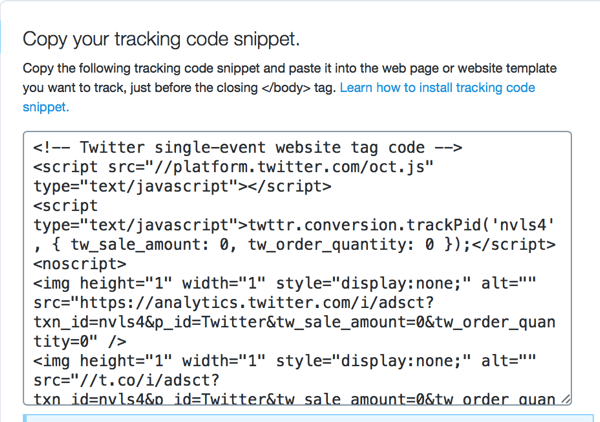
On the next page, you’ll see the box of code for this new tag.
Highlight all of the code and copy
it.

tag you create.
Place this snippet of code on all of the pages on your
site that are relevant to that particular conversion and
only those pages. You can (and should) create and
install…
COMMENTS